Machine and deep learning tooling is excitingly accessible and fun for a developer to work with. There are couple of ways to develop/play with machine learning code:
- Jupyter notebook running locally or on your server
- Jupyter environment/scripting in the cloud:
- Scripting/developing locally
There might be more options I am unaware of or more likely I just cannot find them using simple search engine queries.
I tried couple of those above - Jupyter notebook, scripting locally and Kaggle. The approach you take usually depends on what you want to achieve. If you want to learn then starting with the cloud solution is the shortest way which gives the most pleasure, picking Kaggle could probably be one of the best choices, you can see what others do and can fork their kernels and learn by example.
Whilst playing/learning with machine learning is undeniably a great way to spend your time, it is a bit more exciting to use the skills and build a production ready model for others to consume. For this choice now I pick scripting - writing Python scripts which are later deployed to production and exposed via browser interface.
Note: if you prefer looking into code then check out an implementation supporting this article in Github repo ivarprudnikov/char-rnn-tensorflow
Objectives
- Prepare Python scripts for training & generating
- Store training data & training parameters
- Train models in browser interface
- Generate text based on previously trained model
- Wrap implementation in Docker
- Use CI service to build Docker image for the registry
- Run Docker image on AWS and expose it to the WWW
Text generator
As it happens there are examples of simple text generators in the web. One of them leads me to a character generator detailed in Andrei Karpathy’s blog post “The Unreasonable Effectiveness of Recurrent Neural Networks (RNN)” published in mid 2015. This RNN example relieves me from any explanations how/why it works and is generally concise in its implementation.
Part of the problem is solved but current article mentions Tensorflow and Karpathy’s implementation is written in Torch. For this reason there was a reimplementation of char-rnn I found in another Github repository hzy46/Char-RNN-TensorFlow which I forked and tweaked a bit.
Training
Happily char-rnn-tensorflow is capable of training the model by passing it a text file as an argument amongst other possible options.
python train.py \
  --input_file data/shakespeare.txt  \
  --name shakespeare \
  --num_steps 50 \
  --num_seqs 32 \
  --learning_rate 0.01 \
  --max_steps 20000
Above will produce and save couple of Tensoflow checkpoints but will take some time. Training time varies depending on hardware you have at disposal. Lengthy training process forces us to use asynchronous API when exposing this feature via HTTP so that user gets notified after s/he submits request to train on given data and process finishes in the background.
Generating text
After training completes and checkpoints were saved we can call another script to generate text for us:
python sample.py \
  --converter_path model/shakespeare/converter.pkl \
  --checkpoint_path model/shakespeare/ \
  --max_length 1000
Above script needs a path to checkpoint data to pull variable values from it and use in the rebuilt model, it also uses the vocabulary file which was dumped in the process of training, that includes characters used for text generation.
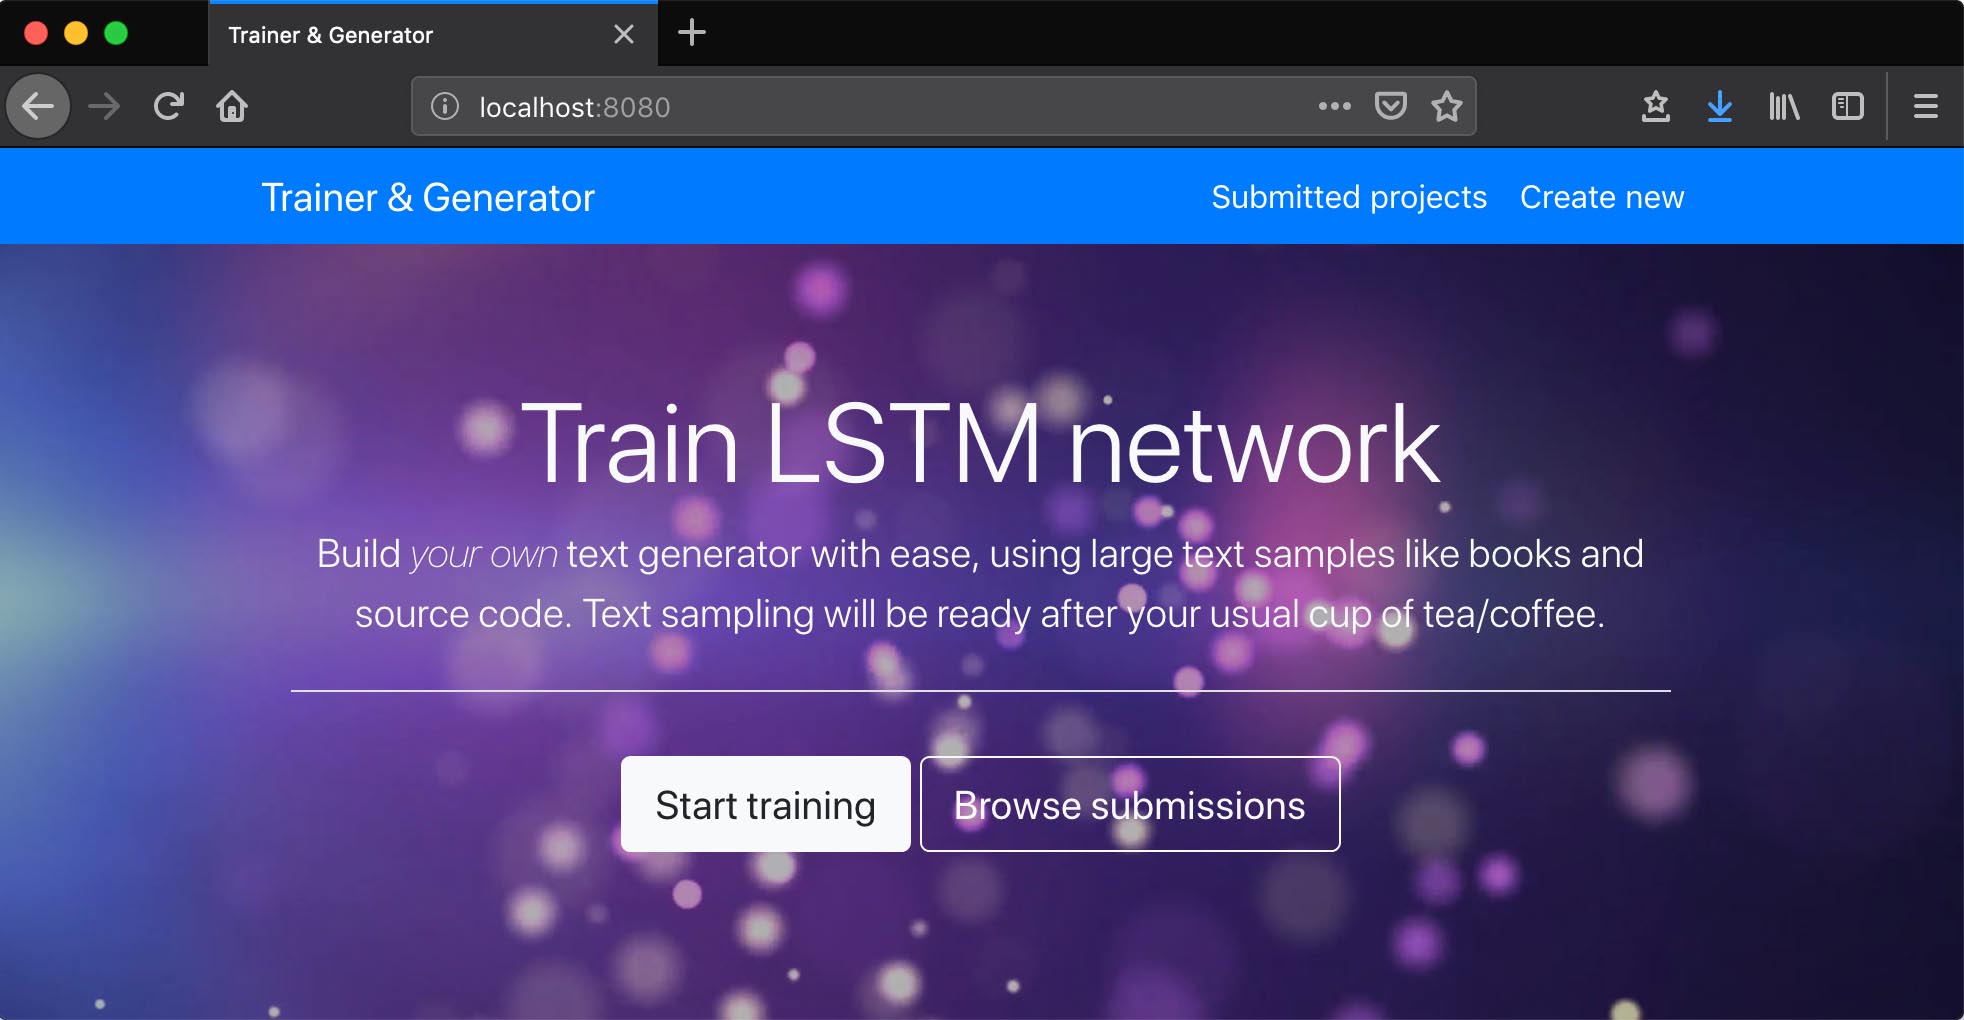
Web application
Given we have python scripts for training and character generation it is possible to wrap those in a simple app exposed to the public internet. User will be able to upload and train her own sample then generate some text after training finishes.
To build an app I’ll use Node.js with Express framework. There will be couple of publicly accessible paths to deal with uploading of training data, training of that data and generating text out of it. User will also be able to see other submissions as we do not care about security and accounts to make this exercise simpler.
Uploading data
Simplest approach to solving the upload problem is a basic html form. User should have UTF-8 encoded plain text file available on her system. And app should be able to render the form and process form POST with multipart/form-data. Ideally uploaded plain text files could be stored somewhere on AWS S3 or similar services to leverage almost infinite scalability but for this exercise I’ll keep those on the same server running application and executing Python scripts.
Render upload form
Basic knowledge of Express framework here is assumed. Below example expects view engine along with default views directory set to be able to render html. If you follow code in git repository it will be a bit different and will have more features used.
router.get('/upload', (req, res) => {
  // render upload.html/upload.ejs file
  res.render('upload')
})
<!-- excerpt from upload html/ejs file -->
<form action="/upload" method="post" enctype="multipart/form-data">
  <fieldset>
    <legend>Training data</legend>
      <label for="customFile">Choose training data file</label>
      <input name="file" type="file" id="customFile" required>
      <small class="form-text text-muted">
        File should be UTF-8 plain/text containing data you want to use for training.
      </small>
  </fieldset>
  <button type="submit">Upload</button>
</form>
Process form POST
In order to process multipart form request I chose to use Busboy dependency.
$ npm i -S busboy
Original filename is not being used and instead is replaced with train.txt which is going to be the same for every upload. In order to distinguish those files they will be living in separate directories named after generated id which is a timestamp here in the example. After successful upload user will be redirected.
router.post('/upload', (req, res) => {

  // generate id
  const id = Date.now()

  // prepare dependency used to process request
  const busboy = new Busboy({
    headers: req.headers,
    limits: {
      fileSize: 1024 * 50, // bytes
      files: 1 // only one file per request
    }
  })
  let fileStream = null
  let filePath = null
  let folderPath = path.join('uploads', id)

  // handle multipart file
  busboy.on('file', (fieldName, file, fileName) => {
    if (fileName) {
      fs.mkdirSync(folderPath)
      filePath = path.join(folderPath, 'train.txt')
      fileStream = file.pipe(fs.createWriteStream(filePath))
    }
  });

  // redirect on success, otherwise render same page with error message
  busboy.on('finish', () => {
    res.set({Connection: 'close'});

    if (!fileStream) {
      res.render('upload', Object.assign(res.locals, {
        error: "Cannot save given training data"
      }));
    } else {
      fileStream.on('finish', async () => {
        res.redirect('/')
      })
      fileStream.on('error', () => {
        res.render('upload', Object.assign(res.locals, {
          error: "Error occurred while saving file"
        }));
      })
    }
  })

  // pipe request stream to our dependency
  req.pipe(busboy)
})
One problem is almost solved, training file is ready to be used.
Storage
We could store everything in the filesystem but eventually it gets quite complicated. Initially I thought example without database will be a bit more readable but the effect was opposite as soon as I wanted to render more details in html. It is useful to track when user uploads data, when training starts and ends, even giving names to those training jobs is useful, but storing them in filesystem seemed a bit dull and verbose to implement.
Apart from those mentioned useful parts it will be necessary to store logs as well. Logs are going to be produced when training on uploaded data. I chose to store those in database after reading quite old Travis blog post Solving the Puzzle of Scalable Log Processing.
Model
There are 2 things I want to store:
modelrepresents training job and contains details such asid, time it was created, training parameters, if user uploaded text data, is training complete, etc.logis part of model but instead of having one big field containing all the text it will be split into lines which will make it easier to insert new data.
Database
Now that there is a relationship between models and structure is known in advance - will not likely to change, it is sensible to choose relational database. I believe that lowest common denominator will be MySQL. Document store such as Mongo does not really make much sense here and not only because of relationship but more due to the nature of log data which will drip line by line.
create table model (
  id             varchar(255) not null,
  created_at     timestamp             DEFAULT CURRENT_TIMESTAMP,
  updated_at     timestamp             DEFAULT CURRENT_TIMESTAMP
  ON UPDATE CURRENT_TIMESTAMP,
  name           varchar(255) not null,
  train_params   json         not null,
  has_data       tinyint      not null default false,
  is_in_progress tinyint      not null default false,
  is_complete    tinyint      not null default false,
  training_pid   varchar(255),
  primary key (id)
)
  ENGINE = InnoDB
  DEFAULT CHARACTER SET utf8
  COLLATE utf8_general_ci;

alter table model
  add constraint unique_id unique (id);
alter table model
  add constraint unique_pid unique (training_pid);

create table model_log (
  model_id varchar(255) not null,
  position int          not null,
  chunk    text         not null
)
  ENGINE = InnoDB
  DEFAULT CHARACTER SET utf8
  COLLATE utf8_general_ci;
alter table model_log
  add index FK_MODEL_LOG_MODEL (model_id),
  add constraint FK_MODEL_LOG_MODEL foreign key (model_id) references model (id);
A quite simple schema encapsulates what I mentioned before, table model will contain metadata about training and model_log will contain chunks of log text. Position in model_log ins necessary in theory to guarantee order of log entries.
In order for Node.js to connect to database we’ll need to get relevant dependency:
$ npm i -S mysql
To verify that connection works we could try listing models:
const mysql = require('mysql')
const pool = mysql.createPool({
  connectionLimit: 10,
  connectTimeout: 20 * 1000,
  acquireTimeout: 20 * 1000,
  timeout: 10 * 1000,
  host: process.env.MYSQL_HOST || 'localhost',
  user: process.env.MYSQL_USER || 'root',
  password: process.env.MYSQL_PASSWORD || '',
  database: process.env.MYSQL_DATABASE || 'rnn_generator',
  port: process.env.MYSQL_PORT || 3306,
  // ssl: "Amazon RDS", will be necessary later
})

pool.query("select * from model order by updated_at desc limit ? offset ?", [10, 0], (error, rows) => {
  console.log(rows)
})
Training parameters
Just before being able to run those scripts we need to pass some arguments to them as well. Before that user ought to be able to tweak them in UI. Arguments are going to be exposed as a web form to the user and upon POST those values will be stored in the database. You can see all of training options used in a web form in the git repository. As an example a form looks similar to the following:
<form action="/<%= locals.model.id %>/options" method="post" enctype="multipart/form-data">

  <h1 class="h3 text-center mb-3">Update training options</h1>

  <% if(locals.errors){ %>
    <p class="alert alert-warning">
      Form contains errors
    </p>
  <% } %>

  <fieldset>
    <legend>Training options</legend>

    <div class="form-group row">
      <label for="num_seqs" class="col-sm-6 col-form-label">Number of seqs in one batch</label>
      <div class="col-sm-6">
        <input name="num_seqs" placeholder="Default: 32" type="number" id="num_seqs"
               class="form-control <% if(fieldErr("num_seqs")){ %>is-invalid<% } %>"
               min="1"
               value="<%=fieldData("num_seqs")%>">
        <% if(fieldErr("num_seqs")){ %>
        <div class="invalid-feedback"><%= fieldErr("num_seqs") %></div>
        <% } %>
      </div>
    </div>

    <!-- More fields in Github repository -->

    <hr class="mt-5">

    <div class="text-right">
      <a href="/model/<%= locals.model.id %>" class="btn btn-outline-secondary">Cancel</a>
      <button type="submit" class="btn btn-primary">Update</button>
    </div>
  </fieldset>
</form>
Above you can see I am using variable interpolation <%= variable %> which is part of ejs templating engine I have configured Express app with. This form expects model to be passed to renderer, the one returned from MySQL and data which holds form field values, it also expects helper functions fieldData() which is a shorcut to access values in data object and fieldErr() which checks if there is an error for a given form field. Rendering of the above looks like:
router.get('/:id/options', checkPathParamSet("id"), loadInstanceById(), (req, res) => {
  res.render('training_options', Object.assign(res.locals, {
    data: JSON.parse(req.instance.train_params),
    model: req.instance
  }))
})
Here checkPathParamSet and loadInstanceById are helper middleware functions that are reused amongst other methods as well:
function checkPathParamSet(paramName) {
  return (req, res, next) => {
    if (!req.params[paramName]) {
      res.render('404')
      return
    }
    next()
  }
}

function loadInstanceById() {
  return async (req, res, next) => {
    let instance = await db.findModel(req.params.id)
    if (!instance) {
      res.render('404')
    } else {
      req.instance = instance;
      next()
    }
  }
}
Schema validation
Storage of training parameters is pretty much straightforward except their validation. To make sure we comply with Python script api those requirements need to be formalized somewhere else but script itself and then validated against before storage. This could also be an ad hoc implementation but validation ought to be reused before calling script as well, also reading code is harder that looking into schema. I am using JSON schema for parameter definition and validation, below example shows only couple of fields:
{
  "$id": "generator/schema/training/options.json",
  "$schema": "http://json-schema.org/draft-07/schema#",
  "type": "object",
  "properties": {
    "num_seqs": {
      "type": "integer",
      "minimum": 1,
      "description": "number of seqs in one batch"
    },
    "num_steps": {
      "type": "integer",
      "minimum": 1,
      "description": "length of one seq"
    }
  },
  "additionalProperties": false
}
There are couple of JSON schema validators in the wild but I chose ajv as it supports latest schema drafts. Lets see how validation logic is implemented:
const Ajv = require('ajv')
// above schema sample
const trainOptionsSchema = require("train_arguments_schema.json")
const ajv = new Ajv({allErrors: true, coerceTypes: true, removeAdditional: true})
const validator = ajv.compile(trainOptionsSchema)

function chackTrainParams(params) {
  if (validator(params)) {
    return null
  }
  let errors = {}
  // validator shows path of failing leaf starting with a dot
  // changing it to simplify rendering of error messages
  validator.errors.forEach((err) => {
    let keyWithoutTrailingDot = err.dataPath.replace(/^\./, "");
    errors[keyWithoutTrailingDot] = err.message
  })
  return errors
}
With above implementation it is easy enough to check if there are any errors in current object:
chackTrainParams({num_seqs: 0})

// returns
// { num_seqs: 'should be >= 1' }
Storage
Previously, for document upload, I used Busboy but when using it with form fields it is a bit verbose, gladly there is a wrapper around that dependency called multer which puts form fields into req.body. For just the form field submissions use multerUpload.none() middleware.
router.post('/:id/options', checkPathParamSet("id"), loadInstanceById(), multerUpload.none(), asyncErrHandler.bind(null, async (req, res) => {

  let model = req.instance

  // filter out empty values
  let params = Object.keys(req.body).reduce((memo, val) => {
    if (req.body[val] != null && req.body[val] !== "") {
      memo[val] = req.body[val]
    }
    return memo
  }, {})

  let errors = chackTrainParams(params)
  if (errors) {
    return res.render('training_options', Object.assign(res.locals, {
      error: "Found " + Object.keys(errors).length + " errors",
      errors: errors,
      data: params,
      model: req.instance
    }))
  }

  await db.updateModel(model.id, {
    train_params: JSON.stringify(params)
  })

  res.redirect(`${req.baseUrl}/${model.id}`)
}))
Another thing above is async error handler which ought to be explicitly written as until now Express does not allow handling them:
const asyncErrHandler = (asyncFn, req, res) => asyncFn(req, res)
  .catch(err => {
    console.log((new Date()).toISOString(), "[ERROR]", util.inspect(err))
    res.status(500).render('500')
  });
Running python scripts
All ingredients are ready to be used, training data will be uploaded to a location on disk, training parameters will be stored in a database. It is now necessary to use those details and run Python scripts which were forked already. I’ve written about how to run Python scripts from within Node.js application already so will not delve into much details, make sure to skim it through though “Using Python scripts in Node.js server”.
Training
First I need action buttons in UI which will start/stop training process, upon click those should hit appropriate path handler in application which will do the rest. Those buttons will be exposed only in certain conditions - start when training data is uploaded and stop only when training is in progress:
<% if(model.is_in_progress){ %>
  <form class="d-inline-block" action="/model/<%= model.id %>/stop" method="post">
    <button type="submit" class="btn btn-sm btn-danger">Stop training</button>
  </form>
<% } else if (model.has_data) { %>
  <form class="d-inline-block" action="/model/<%= model.id %>/start" method="post">
    <button type="submit" class="btn btn-sm btn-outline-primary">Start training</button>
  </form>
<% } %>
Before executing training script we need to be sure it is not running currently, this is achieved by checking if training_pid is present on model instance. It is also necessary to clean up any existing log entries if those exist because relationship prohibits having more than one log representation for training, in other words - one model one log. Then script will be started in a separate process and events coming from it will be both stored in the database and sent to websocket connection to be rendered in real time. Websocket will not be covered here as it is part of other article I mentioned above “Using Python scripts in Node.js server”
router.post('/:id/start', checkPathParamSet("id"), loadInstanceById(), asyncErrHandler.bind(null, async (req, res) => {

  let model = req.instance

  // if in progress then cancel
  if (model.training_pid) {
    return res.redirect(`${req.baseUrl}/${model.id}`)
  }

  const params = JSON.parse(model.train_params || "{}")

  // clear any existing logging
  await db.deleteLogEntries(model.id)

  // launch script process
  let subprocess
  try {
    subprocess = await trainModel(model.id, params)
  } catch (err) {
    // cleanup if error
    await db.setModelTrainingStopped(model.id)
    return res.render('show', Object.assign(res.locals, {
      model: req.instance,
      error: util.inspect(err)
    }))
  }

  // obtain a running websocket instance
  const wss = req.app.get(WEBSOCKET)

  // store logs and also spit it out to websocket ro render them in real time
  let chunkPosition = 1
  subprocess.stdout.on('data', async (data) => {
    let logEntry = {
      model_id: model.id,
      chunk: data + "",
      position: chunkPosition
    }
    await db.insertLogEntry(logEntry)
    wss.broadcast(JSON.stringify(logEntry))
    chunkPosition++
  });
  subprocess.stderr.on('data', async (data) => {
    let logEntry = {
      model_id: model.id,
      chunk: `Error: ${data}`,
      position: chunkPosition
    }
    await db.insertLogEntry(logEntry)
    wss.broadcast(JSON.stringify(logEntry))
    chunkPosition++
  });

  // mark model as in progress
  await db.setModelTrainingStarted(model.id, subprocess.pid);

  // get back to page it was initiated on
  res.redirect(`${req.baseUrl}/${model.id}`)
}))
Script is launched in trainModel() function which returns Promise. In addition to checks above within router handler trainModel() will double check stored training parameters and will then merge them with defaults. Training data and pid file existence will also be checked before spawning a new Python process.
function trainModel(submissionId, params) {

  // defaults
  let args = {
    num_seqs: 32,
    num_steps: 50,
    lstm_size: 128,
    num_layers: 2,
    use_embedding: false,
    embedding_size: 128,
    learning_rate: 0.001,
    train_keep_prob: 0.5,
    max_steps: 1000,
    save_every_n: 1000,
    log_every_n: 100,
    max_vocab: 3500
  }

  return new Promise(function (resolve, reject) {
    if (!submissionId) reject("submissionId required");

    if (typeof params === "object") {
      let errors = chackTrainParams(params)
      if (errors) {
        return reject(errors)
      } else {
        Object.assign(args, params)
      }
    }

    const folderPath = path.join(UPLOADS_PATH, submissionId)
    const trainFilePath = path.join(folderPath, TRAIN_FILENAME)
    if (!fs.existsSync(trainFilePath))
      return reject("missing training data file")

    const trainPidPath = path.join(folderPath, TRAIN_PID_FILENAME)
    const modelDir = path.join(GENERATOR_PATH, MODEL_DIR, submissionId)
    // remove any existing checkpoints
    rimraf.sync(modelDir)
    mkdirp.sync(modelDir)

    let spawnArgs = [
      "-u",
      path.join(GENERATOR_PATH, 'train.py'),
      "--input_file", trainFilePath, // utf8 encoded text file
      "--name", submissionId // name of the model
    ]
    Object.keys(args).forEach((k) => {
      if (k != null && args[k] != null) {
        spawnArgs.push(`--${k}`)
        spawnArgs.push(args[k])
      }
    })
    // run script
    const subprocess = spawn('python', spawnArgs, {
      stdio: ['ignore', "pipe", "pipe"]
    });
    // store pid file
    fs.writeFileSync(trainPidPath, subprocess.pid)

    // cleanup in case of error
    subprocess.on("error", () => {
      rimraf.sync(trainPidPath)
      setModelTrainingStopped(submissionId)
    })
    subprocess.on("exit", () => {
      rimraf.sync(trainPidPath)
      setModelTrainingStopped(submissionId)
    })

    resolve(subprocess);
  })
}
Above will spawn Python process which will execute training script I mentioned in the beginning. Some variables are not clear as they are not defined in this excerpt but you could always look at the source code to see what values they hold
Generating sample
This will be similar as in training, first I need a “button” in UI:
<% if(model.is_complete){ %>
  <button id="sampleBtn" type="button" class="btn btn-sm btn-primary"
      onclick="generateSample()">Generate sample
  </button>
<% } %>

<div id="sample" class="my-3" style="display: none">
  <p class="font-weight-bold">Generated sample</p>
  <div id="sampleOutput" class="bg-dark text-light p-3 small"></div>
</div>

<script>
  function generateSample() {
    $("#sampleOutput").empty()
    $("#sample").show()
    $("#sampleBtn").prop("disabled", true)

    $.get("/model/<%= model.id %>/sample")
      .done(function (data) {
        $("#sampleOutput").text(data)
      })
      .fail(function (data) {
        $("#sampleOutput").text(JSON.stringify(data) || "Error occurred")
      })
      .always(function () {
        $("#sampleBtn").prop("disabled", false)
      })
  }
</script>
Instead of making a form post I’m using some ajax here with a help from jQuery. For anyone wondering why I did not use front end framework for this it is to keep things simpler.
Router will handle /sample endpoint which in turn checks if model finished training via its is_complete flag. It is also necessary to use same parameters as were used for training to make sure correct model representation is created before extracting a text sample.
router.get('/:id/sample', checkPathParamSet("id"), loadInstanceById(), asyncErrHandler.bind(null, async (req, res) => {
  let model = req.instance
  if (!model.is_complete) {
    res.status(400).send({error: "Not ready yet"})
    return
  }

  // use same params from training
  const trainingParams = JSON.parse(model.train_params)
  let args = [
    'lstm_size',
    'num_layers',
    'use_embedding',
    'embedding_size'
  ].reduce((memo, key) => {
    if (trainingParams[key] != null)
      memo[key] = trainingParams[key]
    return memo;
  }, {})

  // TODO somebody add start_string and max_length from query params
  let subprocess
  try {
    subprocess = await sampleModel(model.id, args)
  } catch (err) {
    return res.status(400).send({error: util.inspect(err)})
  }

  subprocess.stderr.on('data', (data) => {
    console.log(`Error: ${data}`)
  });
  res.set('Content-Type', 'text/plain');
  subprocess.stdout.pipe(res)
}))
As you see it is missing start_string and max_length arguments, this will be left for someone else to complete and add some input fields to UI, for now I’ve set some defaults for it to work.
sampleModel() function is similar to trainModel() so it is not necessary for me to repeat it over here you can check it out in source code.
Docker
Implementation here uses a mix of languages which is a bit of a challenge to make sure it runs across different machines. There are couple of issues I’d like to solve with Docker. Firstly correct dependencies have to be used for both Python scripts and Node.js server, then I’d like to run it all with one command, it all needs to be wrapped to be run in production environment. To solve dependency issue one could use virtualenv and npm, to run it all in one command developer could write a shell script but to run it all on production environment you need some orchestration. All mentioned issues can easily be resolved with Docker.
Choosing a base Docker image here is a challenge as I could not find the one with both Node.js and Python support, choose one or the other and install missing components. I chose Python image as a base one as it is a bit more important to make certain those scripts run in consistent environment and I could not guarantee it would always be the same if it was installed from scratch at every deployment to production. Installing Node.js on the other hand is not hard at all when using nvm besides developer usually locks its dependencies with package-lock.json. Furthermore if anything goes wrong with server it will be easier to spot rather than checking in logs if scripts are failing.
Directory structure is split into server and generator. Former contains all Node.js server and latter the scripts.
repo
  +- generator/
  +- server/
  \ Dockerfile
Dockerfile is simple enough without the part that installs Node.js
FROM python:3.6

# replace shell with bash so we can source files
RUN rm /bin/sh && ln -s /bin/bash /bin/sh

# Install node.js
ENV NODE_VERSION 10.12.0
ENV NVM_DIR /usr/local/nvm
RUN mkdir -p $NVM_DIR
# install nvm
# https://github.com/creationix/nvm#install-script
RUN curl -o- https://raw.githubusercontent.com/creationix/nvm/v0.33.11/install.sh | bash
# install node and npm
RUN echo "source $NVM_DIR/nvm.sh && \
    nvm install $NODE_VERSION && \
    nvm alias default $NODE_VERSION && \
    nvm use default" | bash
# add node and npm to path so the commands are available
ENV NODE_PATH $NVM_DIR/versions/node/v$NODE_VERSION/lib/node_modules
ENV PATH $NVM_DIR/versions/node/v$NODE_VERSION/bin:$PATH
# confirm installation
RUN node -v
RUN npm -v

# prepare workdir
ENV APP_PATH /app
ENV SERVER_PATH /app/server
ENV GENERATOR_PATH /app/generator
RUN mkdir -p $SERVER_PATH $GENERATOR_PATH

# separate installation of python deps and copying python assets
# to make sure docker caches installation step
COPY generator/requirements.txt $GENERATOR_PATH/requirements.txt
RUN pip install -r $GENERATOR_PATH/requirements.txt

# separate installation of npm modules
# to make sure docker caches installation step
COPY server/package.json $SERVER_PATH/package.json
COPY server/package-lock.json $SERVER_PATH/package-lock.json
RUN cd $SERVER_PATH && npm install

COPY . $APP_PATH

WORKDIR $SERVER_PATH

EXPOSE 8080

CMD ["npm", "start"]
If you are not very familiar with Docker then all it does is installs Node.js along with nvm, then copies over the files and installs Python dependencies for scripts:
COPY generator/requirements.txt $GENERATOR_PATH/requirements.txt
RUN pip install -r $GENERATOR_PATH/requirements.txt
and then Node.js server dependencies:
COPY server/package.json $SERVER_PATH/package.json
COPY server/package-lock.json $SERVER_PATH/package-lock.json
RUN cd $SERVER_PATH && npm install
To run the above you have to install Docker on your machine and have MySQL running with rnn_generator database created and schema applied to it:
buildcontainer image:docker build -t foobar .runbuilt image:docker run --rm -ti \ -e "MYSQL_HOST=docker.for.mac.localhost" \ -e "MYSQL_USER=root" \ -e "MYSQL_PASSWORD=" \ -e "MYSQL_DATABASE=rnn_generator" \ -p 8080:8080 foobar
docker.for.mac.localhost is meant for OSX users, if you use something else try finding out the value in Docker documentation.
Deployment to AWS
All this exercise was not only about being able to run those scripts locally but also to try and deploy them to environment close to production. For this reason I went with what I usually work with which is AWS. I say close to production because I do not intend to spend money on this example implementation I just made, it will run given tiny resources.
I need couple of parts of infrastructure to make it all work:
- database - RDS
- Docker container registry - Elastic Container Registry (ECR)
- Docker runner - Elastic Beanstalk (EB)
I could have chosen Elastic Container Service (ECS) to run the Docker image on but I got scared trying to use it as there were some many options compared to EB launch configuration.
Docker files can be run on EB but then it builds them at the time of deployment which might take really long time before instance becomes ready to respond to requests. It is much better to build the image on CI server and push it to registry before using it.
CI server
This whole example is hosted on Github and is quite easy to integrate with Travis CI which is also free when used with public repositories. I used it for building the Docker image and pushing it to ECR in AWS. CI configuration is relatively simple not taking into account the shell script I had to assemble for it to build and push image to AWS. It will run Docker build every time there is a new git commit pushed to Github and then will deploy but only on master branch.
sudo: required
language: python
services:
- docker
env:
  global:
  - DOCKER_REPO=ivarprudnikov/rnn-generator
  - AWS_ACCOUNT_ID=<redacted>
  - EB_REGION="eu-west-1"
  - EB_APP="<elastic beanstalk app name>"
  - EB_ENV="<elastic beanstalk environment name>";
  - S3_BUCKET="<s3 bucket name the zipped app will be uploaded to>"
  - secure: <encrypted secret>
  - secure: <encrypted access key>
before_install:
- pip install awscli
- export PATH=$PATH:$HOME/.local/bin
script:
- docker build -t $DOCKER_REPO .
deploy:
  provider: script
  script: bash docker_push.sh
  on:
    branch: master
Deployment script is an assembled version from those I found in the wild internets, it relies on installed awscli sdk to tag the build that was just made and then to push it to registry.
#!/bin/bash -e

TIMESTAMP=$(date '+%Y%m%d%H%M%S')
VERSION="${TIMESTAMP}-${TRAVIS_COMMIT}"
REGISTRY_URL=${AWS_ACCOUNT_ID}.dkr.ecr.${EB_REGION}.amazonaws.com
SOURCE_IMAGE="${DOCKER_REPO}"
TARGET_IMAGE="${REGISTRY_URL}/${DOCKER_REPO}"
TARGET_IMAGE_LATEST="${TARGET_IMAGE}:latest"
TARGET_IMAGE_VERSIONED="${TARGET_IMAGE}:${VERSION}"

aws configure set default.region ${EB_REGION}

# Push image to ECR
###################

$(aws ecr get-login --no-include-email)

# update latest version
docker tag ${SOURCE_IMAGE} ${TARGET_IMAGE_LATEST}
docker push ${TARGET_IMAGE_LATEST}

# push new version
docker tag ${SOURCE_IMAGE} ${TARGET_IMAGE_VERSIONED}
docker push ${TARGET_IMAGE_VERSIONED}

# ...
I do push 2 tags here, the latest one and the versioned one which will allow me to specify it when deploying to Elastic Beanstalk. Keep in mind that ECR has some limits on maximum amount of tags and images. Deployment to EB requires me to push zip field with just the Dockerrun.aws.json in it which in tun tells what docker image to use:
{
  "AWSEBDockerrunVersion": "2",
  "volumes": [],
  "containerDefinitions": [
    {
      "name": "generator",
      "image": "<TARGET_IMAGE>",
      "essential": true,
      "memoryReservation": 96,
      "portMappings": [
        {
          "hostPort": 80,
          "containerPort": 8080
        }
      ],
      "mountPoints": []
    }
  ]
}
json file contains <TARGET_IMAGE> which is replaced in deployment script with a versioned image name:
# ...

ZIP="${VERSION}.zip"

# Deploy new version to Elasticbeanstalk
########################################

# Interpolate Dockerrun.aws.json and also create backup .bak file
sed -i.bak "s#<TARGET_IMAGE>#$TARGET_IMAGE_VERSIONED#" Dockerrun.aws.json

# Zip application
zip -r ${ZIP} Dockerrun.aws.json

# Copy application version over to S3
aws s3 cp ${ZIP} s3://${S3_BUCKET}/${ZIP}

# Create a new application version with the zipped up Dockerrun file
aws elasticbeanstalk create-application-version --application-name ${EB_APP} \
    --version-label ${VERSION} --source-bundle S3Bucket=${S3_BUCKET},S3Key=${ZIP}

# Update the environment to use the new application version
aws elasticbeanstalk update-environment --environment-name ${EB_ENV} \
      --version-label ${VERSION}
Elastic beanstalk
There is part of configuration on CI server which pushes 2 things to AWS: freshly built Docker image and new EB application version. This is almost everything we need except setting up EB environment itself which proved to be a bit catchy and time consuming so I’ll outline some important bits I got caught on.
To start I had to set up AWS RDS MySQL database which in turn resides in a VPC. Then I had to enable Networking under EB application which requires enabling LoadBalancer, the former allows setting up VPC details which are necessary to allow your EC2 instance to be created in that same VPC to then access the database. Apart from VPC which is out of scope here I needed to make sure my application is using correct image and then is correctly mapped in LoadBalancer.

When creating an app make sure to select Multi-container Docker running on 64bit Amazon Linux as previously mentioned Dockerrun.aws.json is using "AWSEBDockerrunVersion": "2".

Summary
Right this is a long one and took me some time to build. Eventually I’ve made it available to public under rnn-generator.dasmicrobot.com but I have little confidence in it working for more than one user as resources allocated to that instance are miserable.
This exercise explored a naive way of running Tensorflow powered scripts via webapp. Even this basic functionality which was achieved required to use wide array of development techniques to make it successiful:
- Node.js powered web server
- Tensorflow powered recurrent neural net implementation
- Websockets to see live progress in UI
- Docker to make sure the application is running in predictable environment
- CI server to automate deployments
- Docker container registry to store images
- Elastic Beanstalk to run Docker container images
- RDS to store sequential data
- Bootstrap framework to assemble UI in html
If you asked me why is there no React in this list I might do something stupid.
Improvements
Current implementation is clunky and hardly scalable as both training script and webserver lives on the same box. Making sure that scripts run in something with GPU would be a great start, I would probably try AWS Lambda or one of their Machine learning products.
After splitting out Python scripts it would be much easier to concentrate on implementing sort of REST API so that website could use more ajax instead of old school forms.
UI could also have more pictures of unicorns to make sure MVP attracts first million in days and not years.
Thank you for reading.
Source code
Source code is available in Github repo ivarprudnikov/char-rnn-tensorflow